This guide is intended for people who have zero or very little exposure to anything related to coding or web development. By the end of this you'll have your very own link-in-bio style website that you can host on your own domain for free. You will also understand some fundamental basics about web development. If you run into any issues along the way feel free to send me an email at olivernelson@hey.com , I'd be more than happy to help.
1. Create a free Github Account
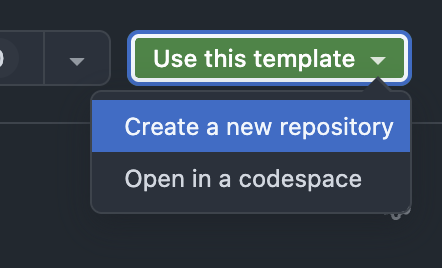
Go to Github and create a free account. Then go to one of my repositories. A code repository can be thought of like a project or folder. In the context of GitHub, a code repository is a place 'in the cloud' where we can save our code files. Think Dropbox, but for coding. Once you are on the page of my repo 'pico-css-starter', click the 'Use this template' button then select 'Create a new repository'.
This is going to copy my repository to your account. Maybe name it something like 'link-in-bio'.
2. Download VsCode
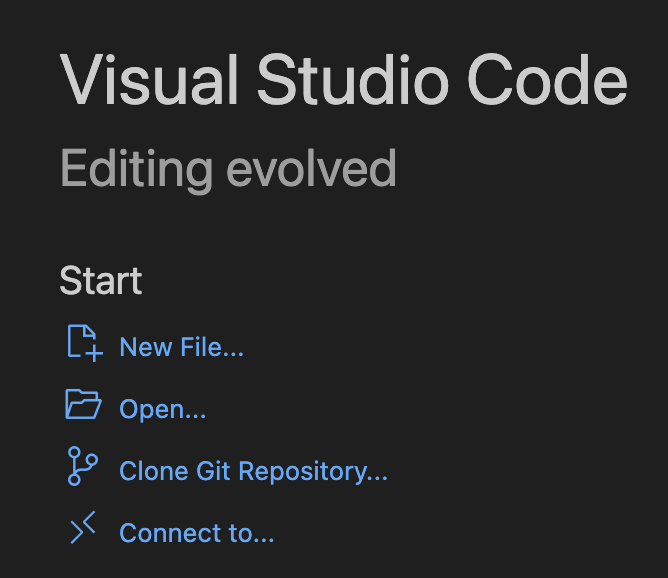
Follow this link to download and install an app called Visual Studio Code. It's a very popular (and beginner friendly) text editor that we're going to use to write the very simple bits of code required to get this going. Once you have VsCode installed on your computer, open it up and click the 'Clone git repository' option.
This will prompt you to connect VsCode with Github. After clicking through the various steps you should be able to select the 'link-in-bio' repository from the drop down list.
'Cloning' a repository means that we are going to download a copy of the repository to your computer. This gives you the ability to work on your project locally and keep it in sync with Github. This is great for backing up your work enables us to do various other things like host your site on the internet.
3. Get the lay of the land
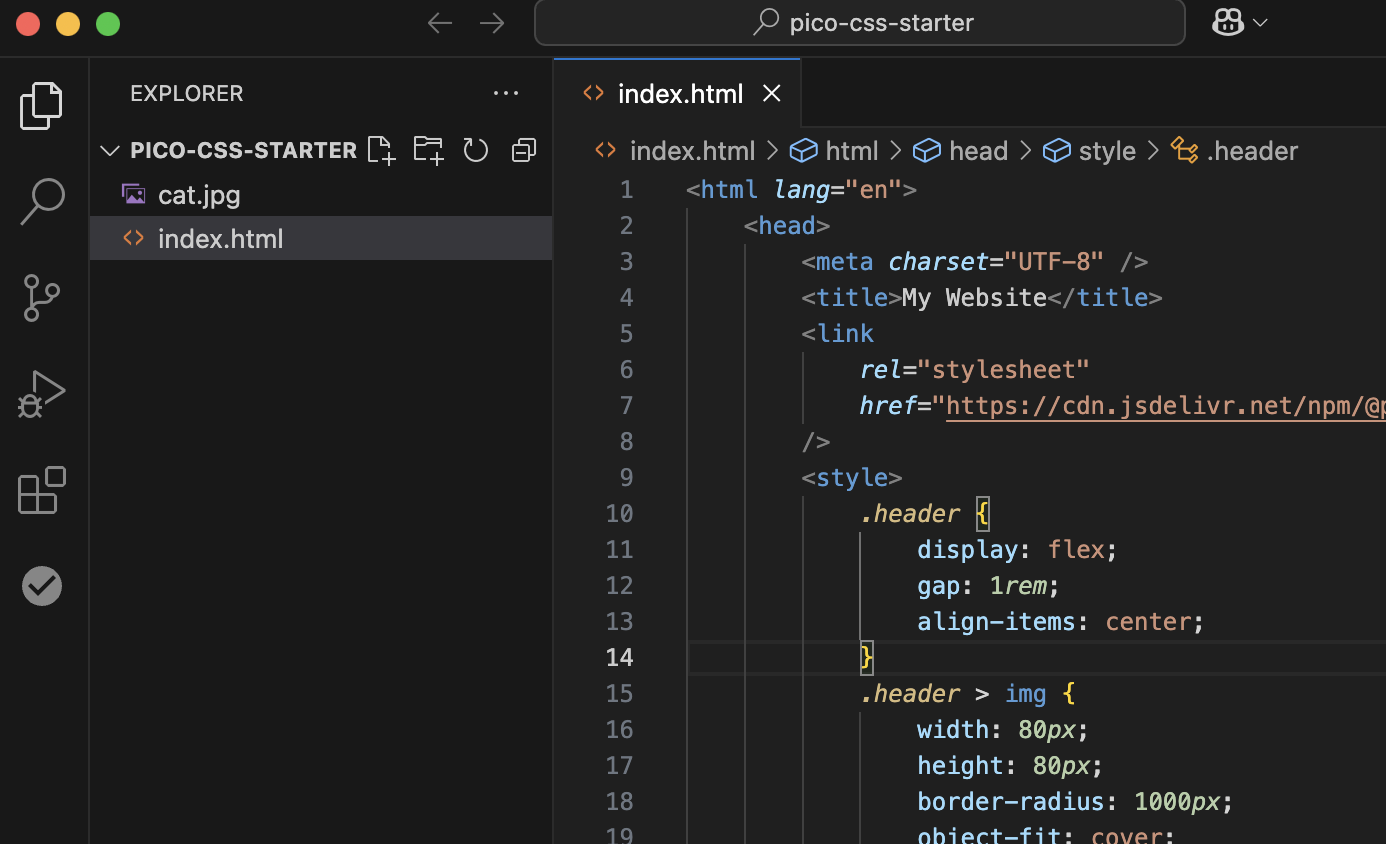
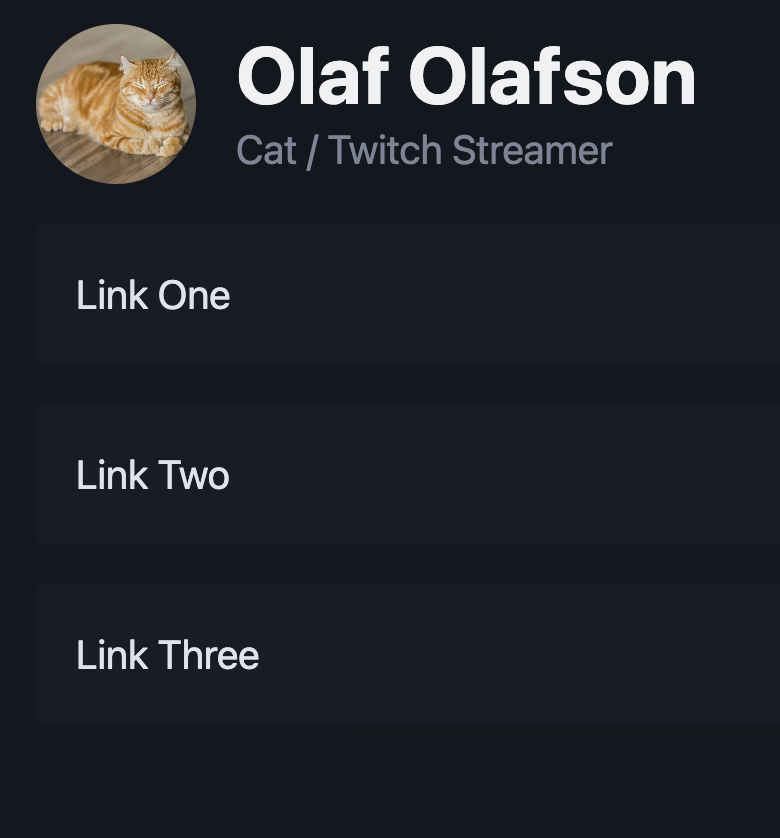
Now that you have VsCode open and your repository cloned. Click the index.html file in the side bar to open it to start editing. You should see something that looks like this:
Welcome to HTML. Every website that you've ever been to uses it. In simple terms, HTML consists of simple building blocks that we can use to tell the browser what to display. You don't need to know a lot about HTML to complete this project but it's helpful if you understand some basic rules.
4. Some HTML basics
HTML is written with tags. A tag has a start, middle (or content), and end. For example, a tag that tells the browser to display a big heading looks like this:
<h1>My Website</h1>
"h1" stands for "heading one" and will render a heading on the page that looks something like this:
Notice how the text "My Website" is placed in between "<h1>" and "</h1>". A starting html tag always starts with "<" and an ending tag always starts with "</". Here's an example of a paragraph or p tag:
<p>It was the best of times, it was the worst of times</p>
5. View your webpage locally
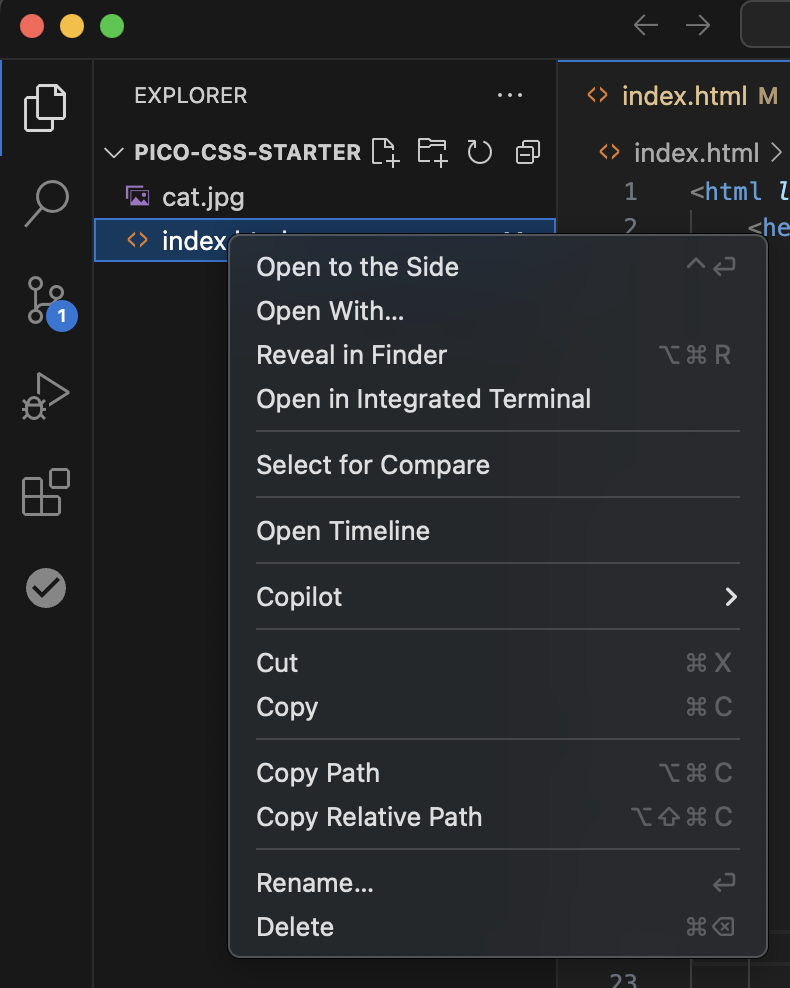
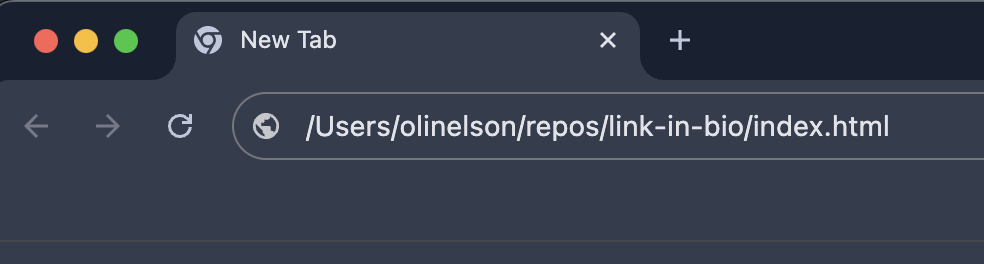
We can use the web browser to display your local html page. This is essential as we need to get visual feedback on the changes that we're going to make. Right-click (or control click) on the index.html file in the sidebar and click 'copy path'.
Open Google Chrome, or your preferred web browser, and paste the path you just copied into the url bar. It will look something like this.
This will make the browser 'open' your html file and you will be able to see it in the browser window.
If you're using Safari and find yourself spat out to Google instead of seeing your local HTML page you might have to be more specific with the text you enter into the url bar. Make sure there is "file://" at the beginning of the path. A complete example would look like this.
Notice that there are three slashes after "file:".
6. How to make changes
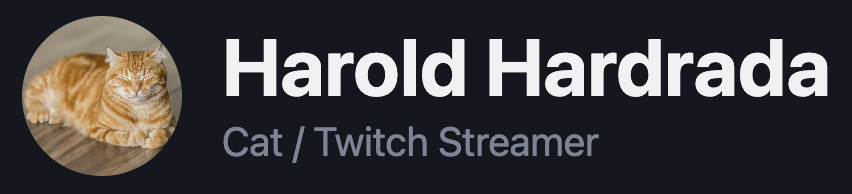
Now we can make changes to our mini website and see what they will look like in the browser. Place your VsCode window and Chrome Window side by side so you can quickly move between them. Find the h1 tag in the index.html file and replace it's contents so it now looks like:
<h1>Harold Hardrada</h1>
Now, save the file (by clicking File -> Save or typing Command S). Now go to the web browser window and refresh the page. You should now see the main heading has changed.
This is how we are going to develop your mini site.
Make the change in VsCode
Save the file
Refresh the page in Chrome
Repeat
7. Fill in your details
Now is the time! Go forth and populate the header in the index.html page with something that matches your use case. Make the contents of the <h1> tag your name or your brand name and fill in the <p> tag directly below it with some catchy subtitle / tagline.
     <hgroup>
      <h1>Eric The Red</h1>
      <p>Dad, Sailor, Explorer</p>
     </hgroup>
8. An intro to links
It wouldn't be a 'link-in-bio' site without some links so let's talk about the <a> tag. These are link tags. The 'a' stands for 'anchor' because back in the day, people used to think about links as "anchoring" one page to another. Consider the example below:
This tells the browser to render a link that displays the text 'Oli Nelson' and when clicked will take the user to olinelson.com. We have also encountered our first tag attribute!
Notice how in the opening tag of our link there is extra information? Some HTML tags have attributes that you can add to them that change their behaviour. Attributes always live in the opening tag of an element.
We can change where this link takes the user by changing the value of the "href" attribute (href stands for hypertext reference by the way). So If I wanted the link to take the user to another website I could do the following:
Notice how I changed the href value by changing the url inside the double quotes to something else? Also notice how what the link looks like hasn't changed? If we want the link to display something different we must alter the contents in between the <a> and </a> tags like so:
Let's now add some real links to your socials and other sites from your new link-in-bio page. Find one of the existing <a> tags in the index.html file and update it to look something like this:
Don't freak out with the formatting here. This behaves exactly the same as the links that we saw earlier it's just that in this case the tag is spaced out over a few lines.
You might notice that there are also two new attributes on these <a> tags.
target="_blank" - this tells the browser to open the link in a new tab.
class="contrast" - this adds some extra styling information, don't worry about this for now.
If you need to add more than the provided three links simply copy and paste one of them, taking care to copy everything starting at '<a' and finishing at '</a>'.
10. Adding your image
Unless you really like cats you'll probably want to swap out the placeholder image for one of your own. To do this, drag your image onto the VsCode sidebar to add it to the repository. Find the img tag in the index.html file.
<img src="./cat.jpg" />
This tag, as you've probably deduced, is the image tag. The src (short for source) attribute determines where the browser will try and get the image file from. To make this display your newly added image, simply change the src attribute.
<img src="./your-actual-image.jpg" />
Make sure you keep the "./" before the name of your file. This means that the browser will look in the same folder as the html file for the image. If your file name has any spaces in it (you savage) the best thing to do is replace them with more coding friendly characters like "-" or "_".
11. Pushing your changes to GitHub
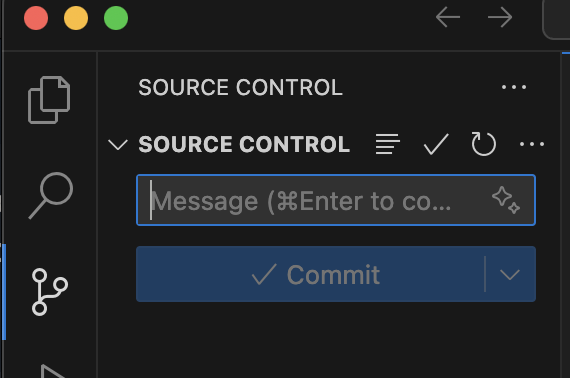
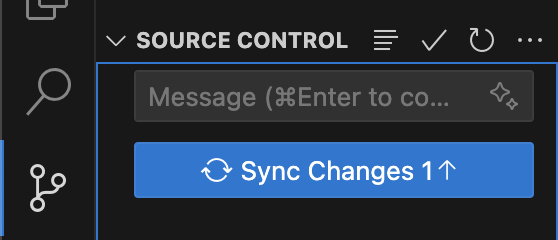
The time has come to send your updated code to GitHub. On the left side panel of VsCode select the Source Control tab.
Most programmers (the sane ones) use a system called Git to save their work. At a high level, Git is a way of saving your work in chunks called 'commits'. You label every commit with a message so that it's easy to keep track of it. This is useful if you want to undo some changes and various other things that save one's bacon.
Type a commit message in the message box, maybe something like "added real info". Then click 'Commit', then 'Sync Changes'
Your changes should be now synced with GitHub.
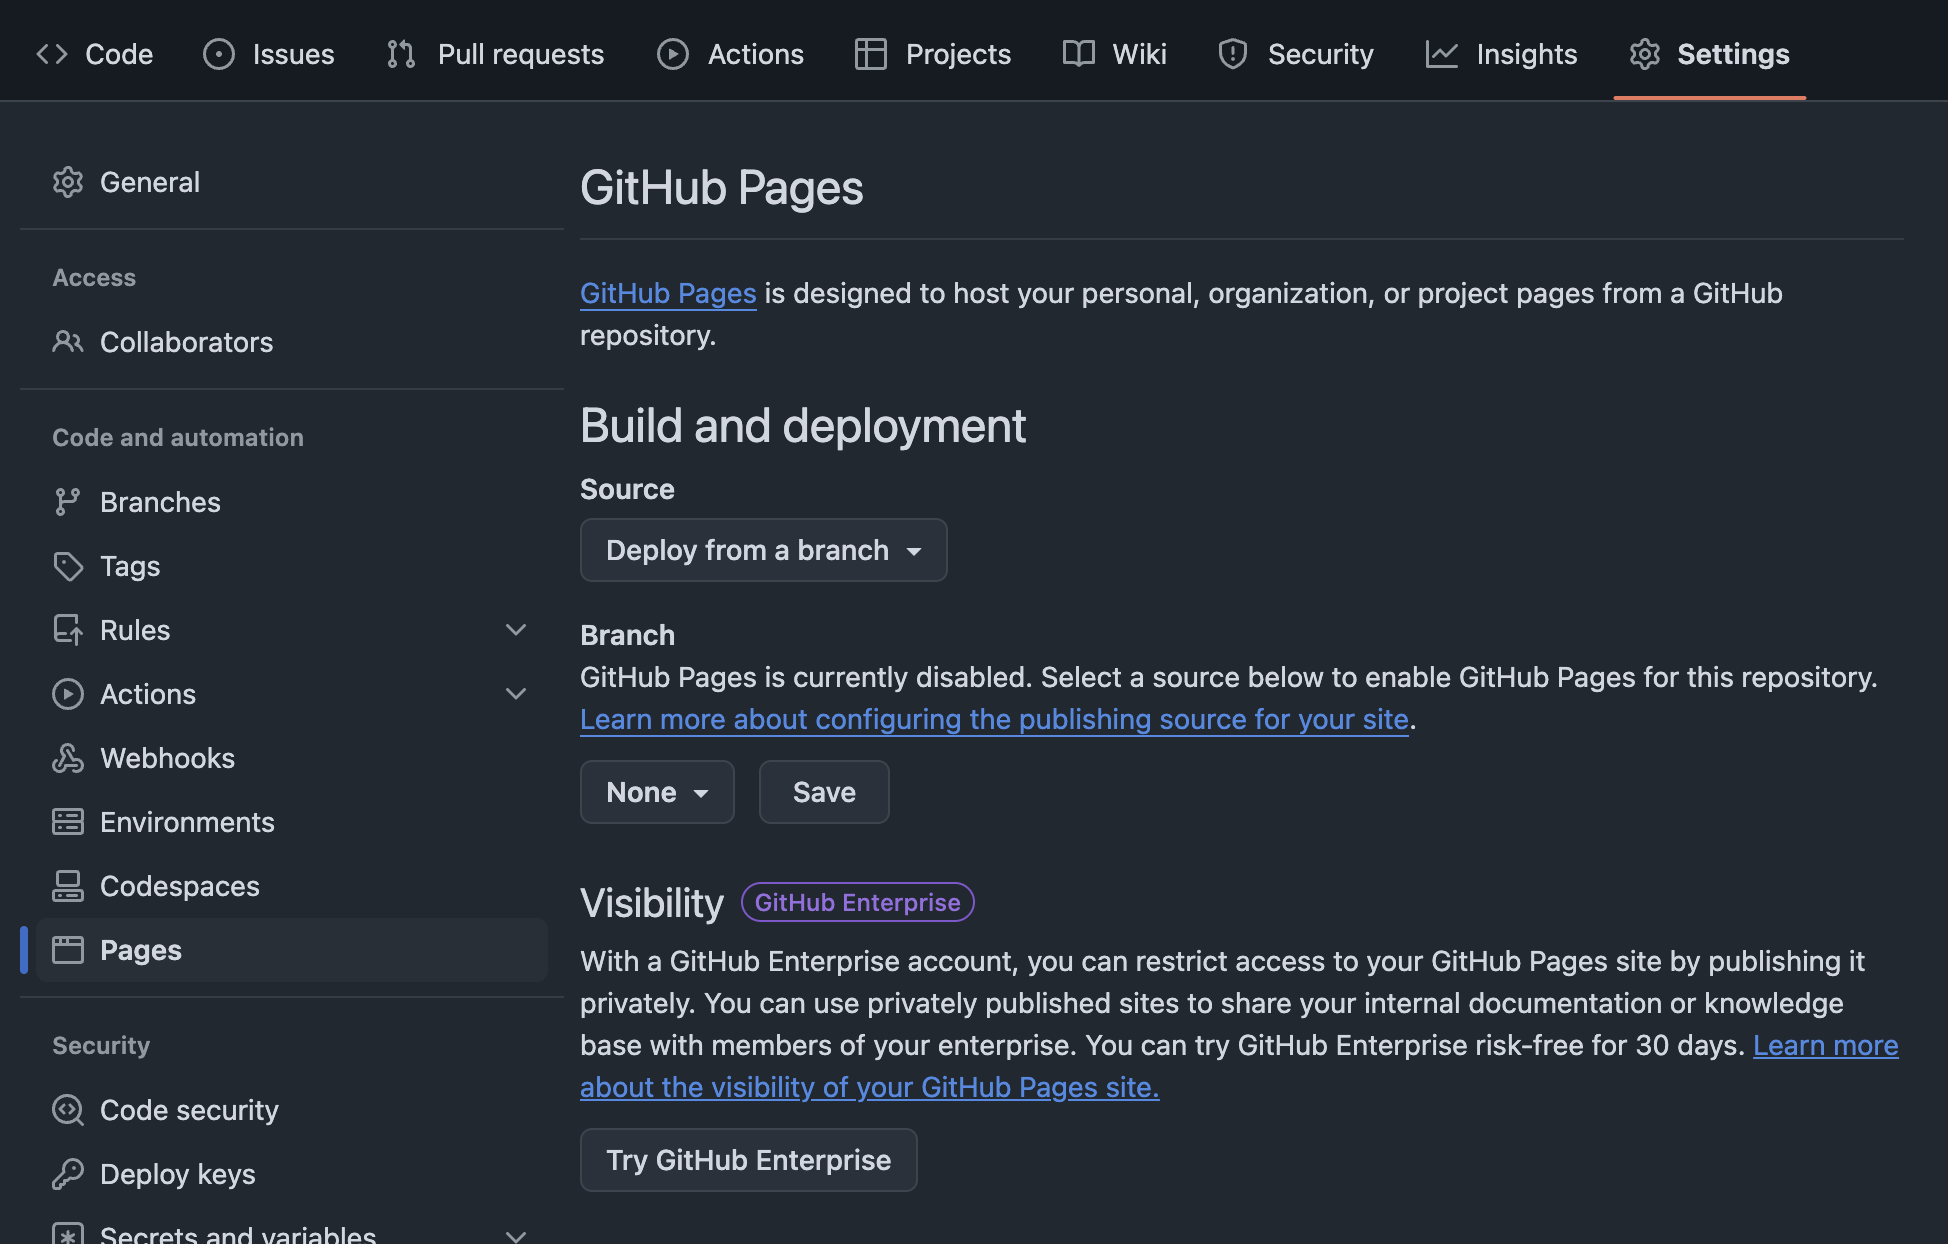
12. Hosting Your New Site
GitHub has a wonderful feature called GitHub Pages. It enables you to host static websites for free, even on your own domain. To get started go to your code repository in GitHub and click 'Settings', then 'Pages', you should see the GitHub Pages settings page.
Under the heading 'Branch' select the first option in the dropdown. It will be either 'master' or 'main'. Then click 'Save'.
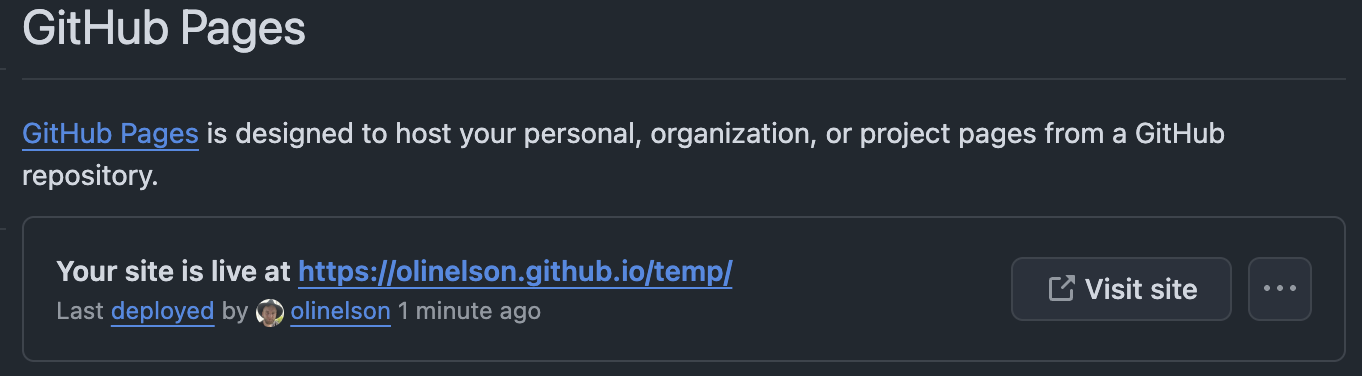
After a minute or so, if you refresh the page, you should see this at the top of the page.
You site is now live!
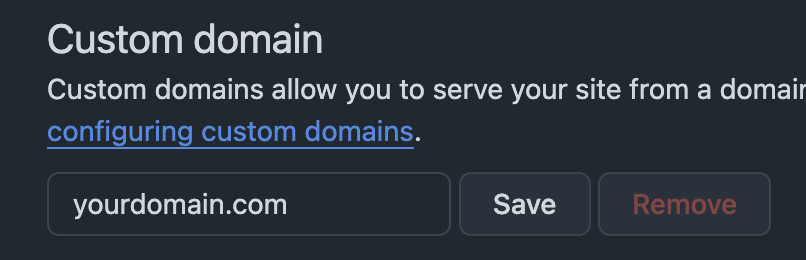
13. Connecting Your Domain
Under the custom domain heading, type your domain that you want to connect in the text box and click 'Save'.
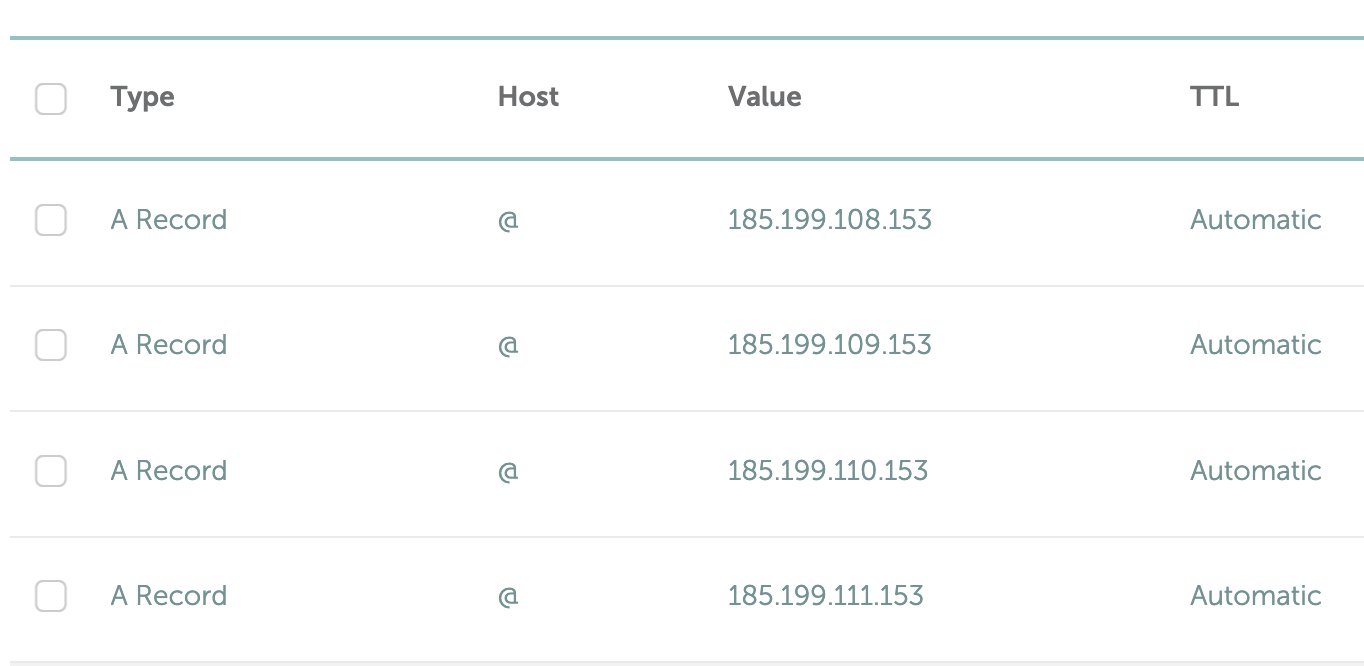
We now need to change your DNS settings so that your domain points to GitHub. Where does your domain live? GoDaddy? Namecheap? Log in to your account and go to your domains DNS settings. We need to create 4 new A records all with the host of '@'.
185.199.108.153
185.199.109.153
185.199.110.153
185.199.111.153
When you're done it should look something like this.
Don't worry about the TTL or Time To Live setting, just set it to the smallest value or automatic.
Go back to your GitHub Pages settings and check the status of the domain connection. I can sometimes take a little while. Also make sure that the 'Enforce HTTPS' option is checked. Without this, most browsers will stop people from being able to visit your site and you will come across as a Nigerian Prince needing but a small donation to unlock dynastic wealth!
After a few minutes your site should now be live on your domain!
If you ran into any issues feel free to shoot me an email at olivernelson@hey.com , I'd love to help.
This is just the beginning! As you can imagine we could build-out all sorts of features and improvements. Maybe we could make the links look a little nicer? Add a contact form? Add some icons? The potential is infinite!