How we built it: Talia’s Tutoring Startup Kit, Part 2
In Part 1, we covered how we came up with the concept and validated our idea for Talia’s Tutoring Startup Kit. When we created the landing page for pre-orders at the Merry Market in December, we had a plausible idea of what shape the kit would take. But now that we had an order, we had to work through all the details of actually making the templates and supporting material. This post describes how we made product decisions — making adjustments where necessary while staying true to the original vision — and what we learned along the way.
It’s organized into a few sections, along with some wrap-up:
Laying the foundation
Productizing peer tutoring
Overcoming technical challenges
What’s next
1. Laying the foundation
Before we dove into process and content, we took some time to talk through and decide on a few foundational elements of the kit that would help make future decisions easier. This included establishing guiding principles, picking a platform, and defining a style guide.
Establishing guiding principles
Agreeing on guiding principles up front made it easier to settle arguments once we were in the weeds of small decisions. This became a set of expectations we could use to evaluate our ideas. For example, will it be complete without this feature? Or, does it feel well-built?
Address the end-to-end business process. Being a tutor is about more than knowing the subject. You have to find customers, deliver a high-quality service, and get paid for it. The kit should be complete.
Reduce friction to reach escape velocity quickly. Getting started is the hardest part. Focus on what’s needed now instead of later. The kit should inspire confidence and action.
Sweat the details to create a sense of high-quality. Teens are cash-strapped, budget conscious, and skeptical. They want to feel confident they’re getting their money’s worth. The kit should feel well-built.
Picking a platform
A big decision we had to make up front was what tool to use to actually build the kit. Technically, it could be a PDF, but we knew that wouldn’t meet our goals of interactivity and elegance. We didn’t want it to be learning material only. We wanted you to actually run your business with it. Talia was already doing this to a degree with Google Docs, so that was a strong contender. We also considered other options, like Notion or a hybrid approach using GitHub. Two factors we considered were cost and platform risk. We certainly wanted there to be zero costs up front. But we were also leery of getting locked into something that could be pulled out from under you later. Google is notorious for shutting down apps. And we’re still not sure Notion won’t become the next Evernote. We decided to go with Google, mainly for the interconnection between the suite, including Docs, Sheets, Forms, and Sites. Defining a style
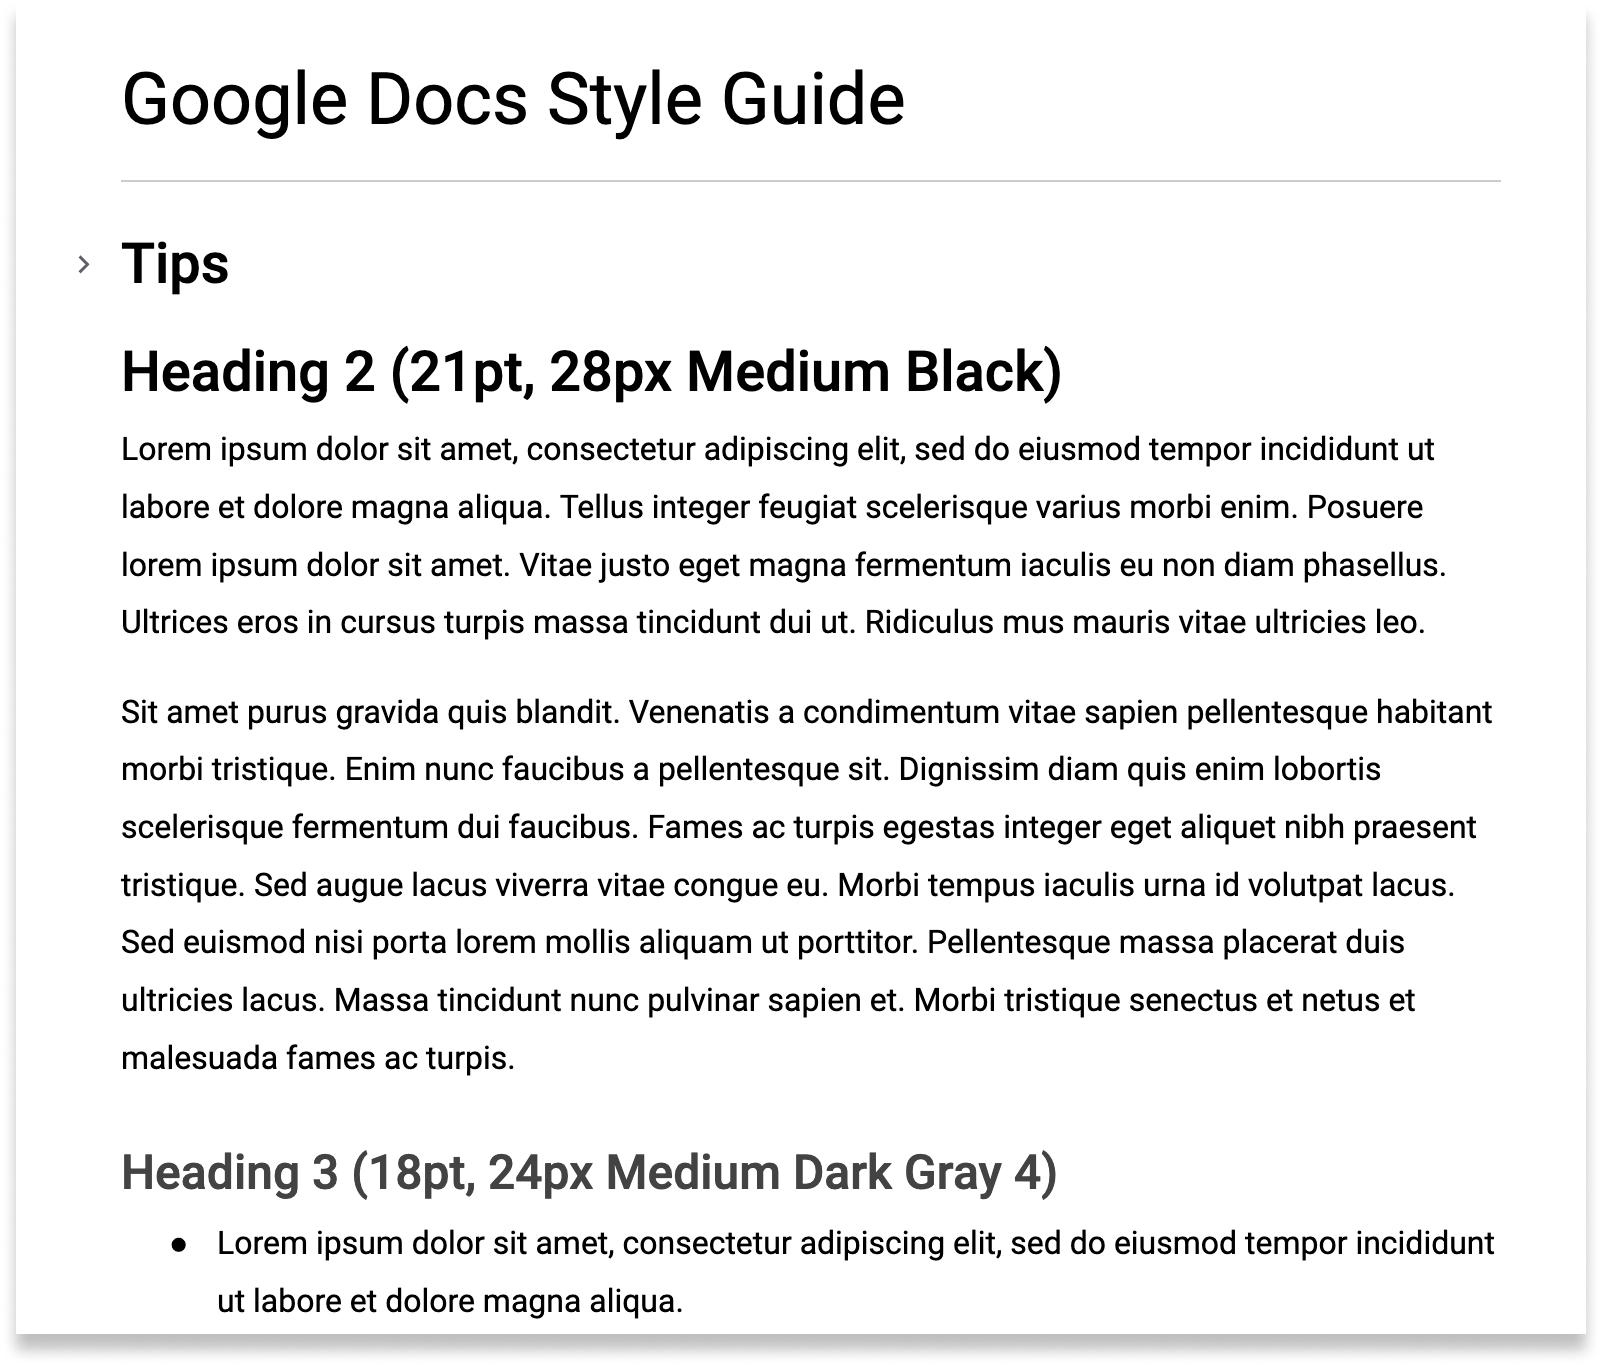
One simple thing we did early on to create a feel of high-quality (not to mention help our future selves) was to establish a style guide, keeping all the template files looking professional and consistent. The default style of a Google Doc is pretty basic and not very aesthetic, but with a few tweaks to the typeface, heading font sizes, and line spacing, you can achieve a much nicer-looking and more inviting document. Using typography guidance from Google’s Material design system, we set up an example document with the styles we wanted and then set the preference to “use as my default styles.” Now we could use this document as the starting point for all the templates. And if something ever got out of whack, we had the same settings baked into the Google Docs editor, so we could bring it back into line.
Part of the Google Docs style guide we used for all the templates.
The other element of style we wanted to keep consistent was our use of language, grammar, and syntax. This was harder to establish up front, as Talia and I had different preferences for things like whether to use title case or sentence case for section headings. So for content, we kept a running list of decisions. As we were writing or editing, whenever a question would come up, we would capture it, talk about it, and agree on what to do moving forward. Some of these guidelines were subtle but important for inclusivity (like using customer and student instead of parent and child since we weren’t always sure about relationships) and others minutely detailed but helpful for consistency (like whether to use the extra “e” in the spelling of acknowledgment). By establishing both these visual and content style guides and using them as we were creating content, we probably saved ourselves a lot of time by not having to go back to review and reformat the templates.
2. Productizing peer tutoring
After laying the foundation, we were ready to dive into actual product creation. Of course, this didn’t happen perfectly sequentially, as we had been discussing and playing with specific ideas from the beginning. But these are examples of some milestones we reached along the path of building the kit.
Running a business like Clockwork
We wanted the kit to be a complete package, representing the full business process, so teen tutors were not only making good money but learning valuable lessons about business in general. In addition to The Minimalist Entrepreneur mentioned in Part 1, we also took inspiration from Clockwork by Mike Michalowicz. It’s all about how to run your business instead of your business running you. I really like how he breaks down the business process in a clear, simple way anyone can understand. He uses a catchy acronym, ACDC, to make it easy to remember:
You attract potential customers.
You convert some of them into actual customers.
You deliver your product or service.
You collect payment!
It’s really just another way to talk about marketing, sales, product, and accounting, but this framework helped us organize and refine both the templates and Talia’s process. Adding a sale step
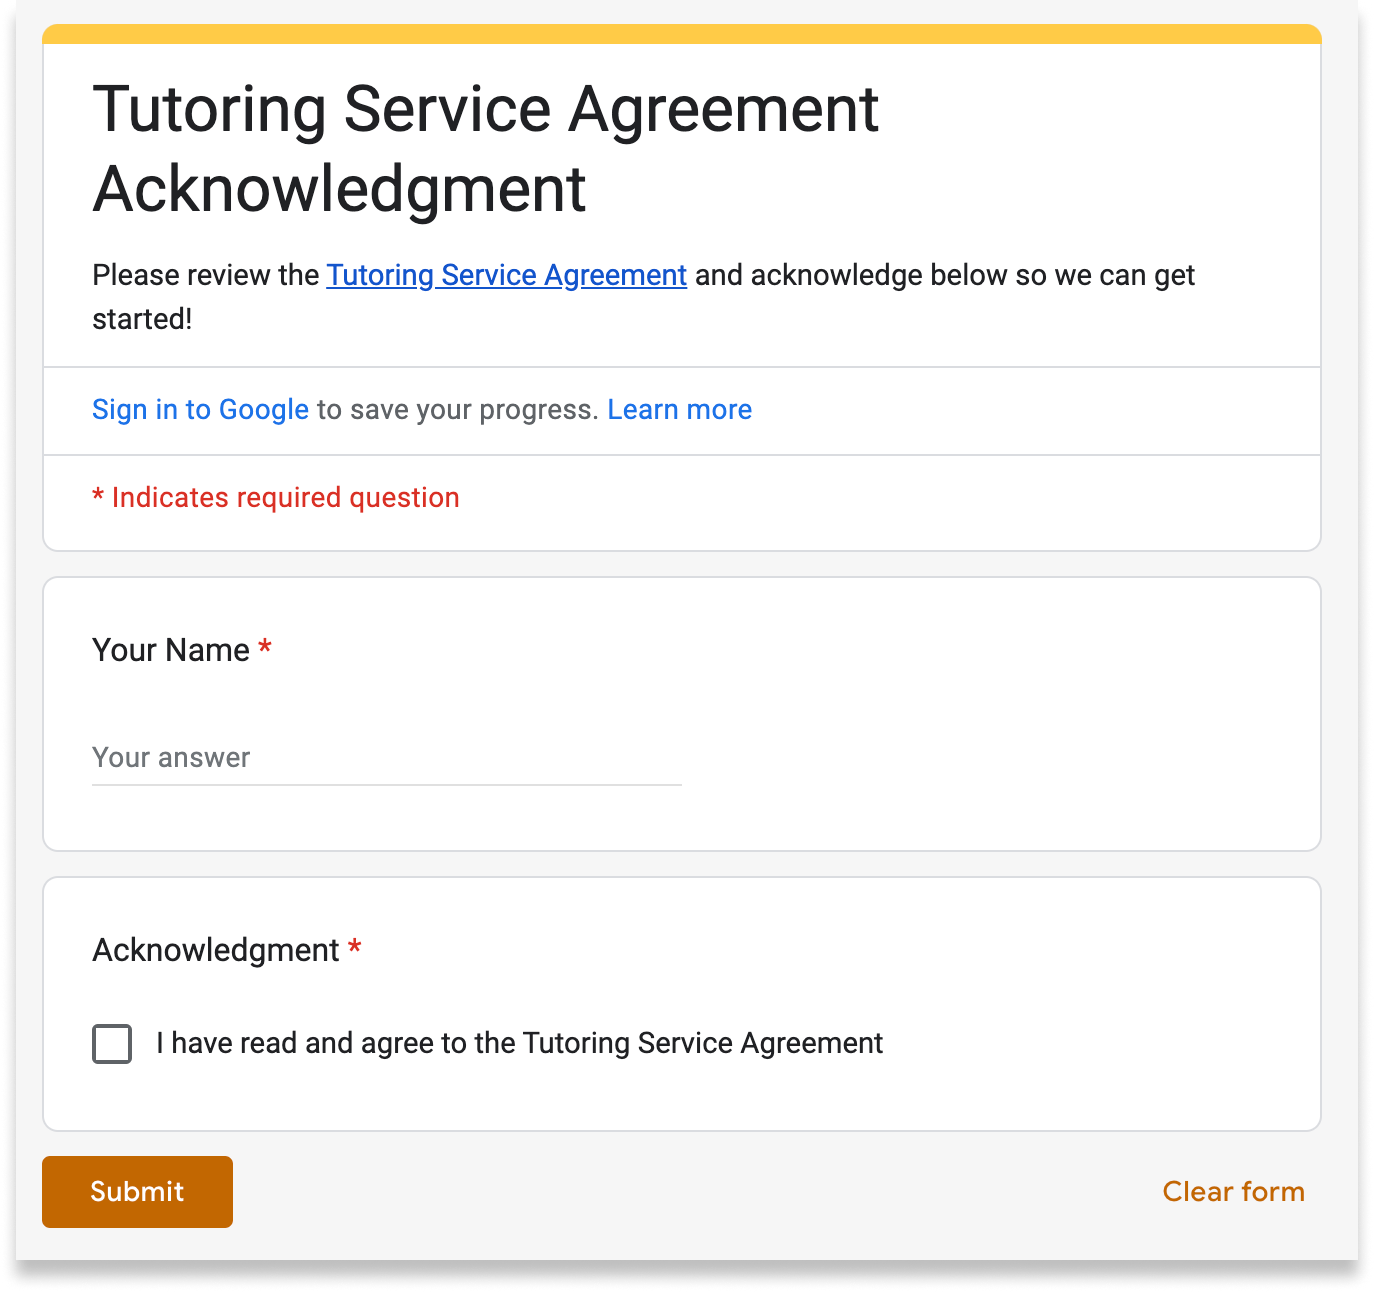
We realized we didn’t have a clear “sales” step. Talia certainly converted potential customers to actual ones, but the transition could sometimes be vague, relying on a text or a verbal confirmation to “start soon.” We determined it would help Talia, and probably other peer tutors, to include a more distinct step in the process, so we added an acknowledgment form. Now, when someone decides to start receiving tutoring, Talia sends a link to her policy (also included in the kit), and asks them to review and acknowledge it. Although no money changes hands at this point, we felt it made sense to consider this “closing the sale” because it signaled clear intent for them to begin tutoring. It also meant Talia could now loop them in to her “scheduling reminder” messaging. Once someone completes the form, it changes why and how she communicates with them.
A simple service agreement acknowledgment form marks the start of the engagement. Keeping parents in the loop with document notifications
Another improvement she made was using a Google Docs feature to make parental awareness and involvement easier and more engaging. Talia would regularly update parents on their kids’ progress by texting them summaries and reminders. By tracking progress in a Google Doc instead, parents could “subscribe” to the document and be notified of changes automatically. This way you have one location where tutor, parent, and student can all see the same information about what they worked on and what the student needs to do next.
By revisiting Clockwork and The Minimalist Entrepreneur and thinking about how to “productize” peer tutoring, we discovered ways to improve and refine Talia’s current service. Once we started really digging into her process and thinking about how we could use the technology to support it, we uncovered more of these ideas that we knew would make the kit more useful and more valuable to new tutors. Keeping scheduling simple
One topic we decided to leave out of the kit was advanced scheduling. Once Talia got to the point where she had more than a handful of students, she decided to use an ad-hoc, weekly booking system. Previously, everyone would get their own regular time. But it became difficult to manage when plans changed or people couldn’t make it one week. Now everyone can see what their schedule looks like each week and book a session accordingly. This enables her to make efficient use of her time slots and take on more students since not everyone will want to meet every week. Google Calendar makes this easy to set up, and it’s been working well. But when we thought about how to incorporate these instructions, we realized most new tutors won’t need this level of flexibility right away. When onboarding your first few customers, it’s much easier to give them a consistent weekly time, so that’s what we recommend in the kit. Flexible scheduling can always be added later, and Talia can share additional content on how to set this up and manage it. Focusing on the principle of reducing friction to reach escape velocity quickly helped us make the decision to leave this out.
Being pleasantly surprised by Sites
One feature that ended up much better than we thought was the marketing website. Even with all the tools at our disposal today, it’s really easy to make a really bad website. It’s also easy for making a website to become a barrier to starting a business, either because people are worried about it being too technical or they’re too picky about how it looks. What we wanted was something simple, that felt like editing a document, but also looked professional, without people needing to become web development experts. Our initial idea was to use a Google Form as a basic landing page website — like we did to promote the kit at the Merry Market. Anyone could set it up, and it looked OK, but it was pretty basic. We also thought about offering an “advanced” version that relied on GitHub Pages, but this was definitely a more tech-heavy approach. While both options were free, neither struck the right balance of ease of use and professionalism. Fortunately, I decided to give Google Sites another look and was pleasantly surprised to see it had become much better over the years. They’ve made it feel much more like editing a Google Doc or theming a Google Slides presentation. With Sites, we could build an example with placeholders that new tutors could easily replace with their own content and then publish. It’s a great solution to get something that’s good enough out there quickly. You can even use your own domain name, though we don’t recommend this to get started.
3. Overcoming technical challenges
While building the kit, we ran into some inevitable challenges that we had to work through. Some were anticipated, like figuring out how to manage the actual delivery of the kit (a set of templates using a cloud-based service) once someone paid for it. And some were unexpected, like realizing that automatically formatting responses to a Google Form in a Google Sheet was not so easy.
Getting our docs from draft to delivery
One of the main technical problems we had to figure out was how to go from draft document to live template in a way that was manageable for us and easy for customers. Here’s the process we came up with for creating, versioning, and delivering the template files using the Google Docs suite:
Create and iterate on files in a Drafts folder.
When a file is ready, name the version in the Version History (based on the date, for example, v2023-12-15). This way we could keep track of updates made after a release.
Copy the file to the Live folder. This is the folder we share with purchasers where they can access the files. Copying them from the Drafts folder clears out the version history so they start with a clean slate. Separating them also enables us to try out changes before releasing them to customers.
Lock the file. This prevents us from making inadvertent changes to the released files.
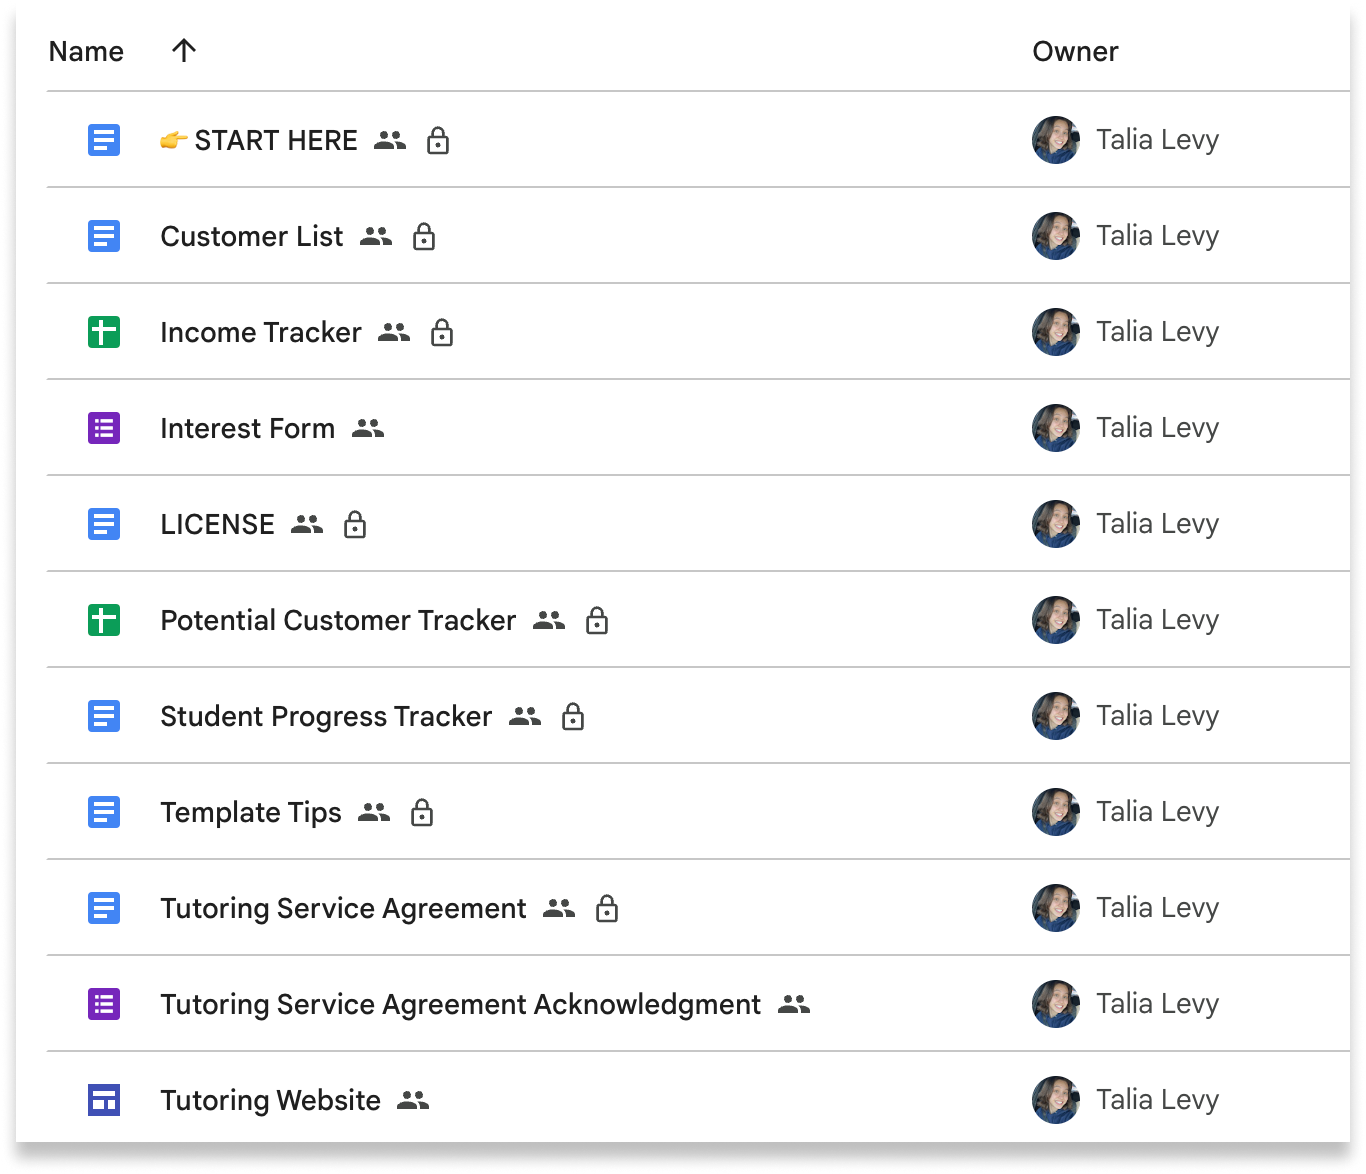
After purchase, share the Live folder with Viewer access. This enables customers to make copies of the templates into their Google account without affecting the original files.
The kit contents on Google Drive. Scripting our way to Sheets style
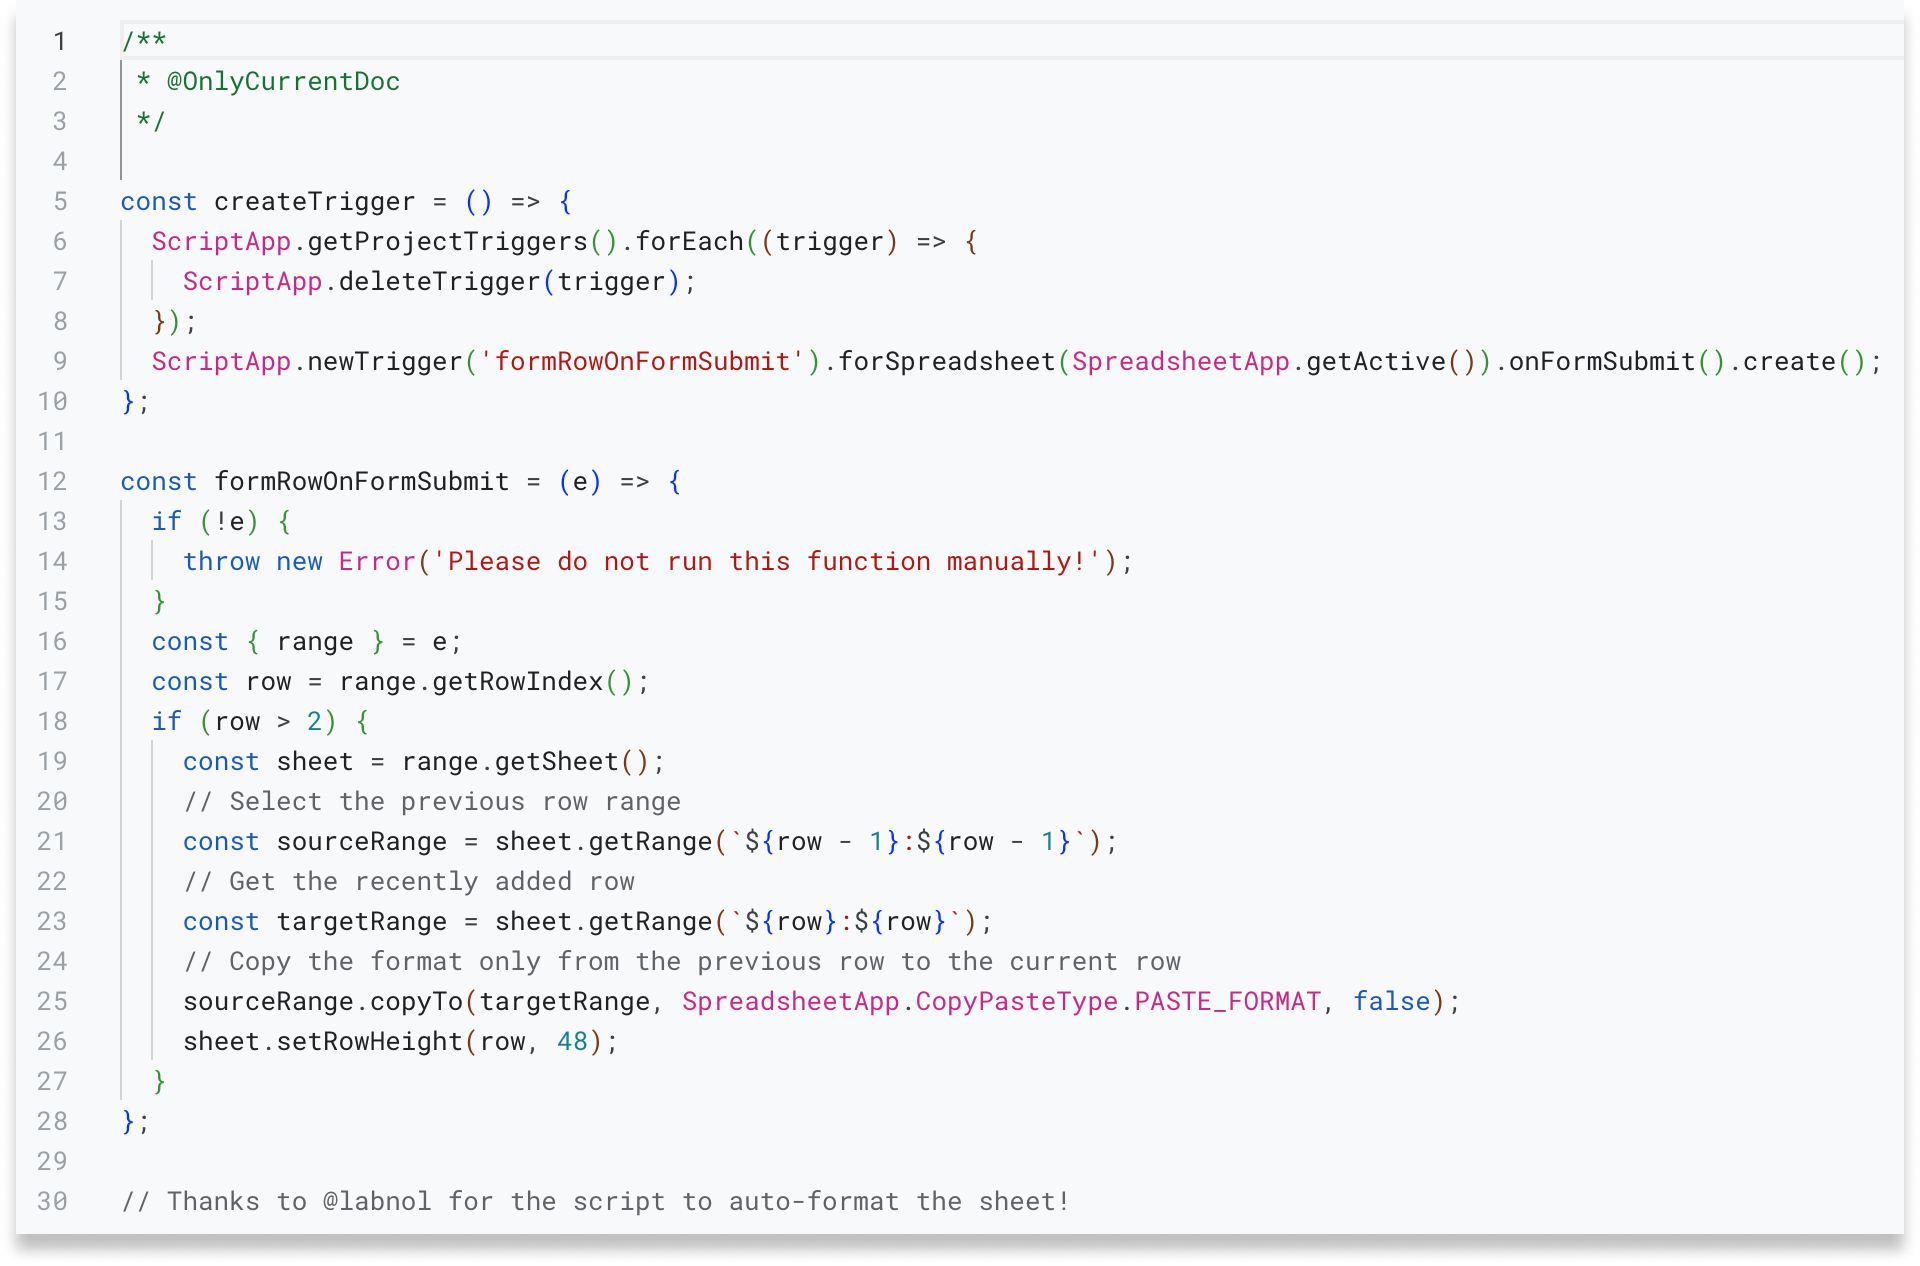
One challenge we ran into was how to get the form response sheets to follow our style guide. We could format the existing cell content, but when new rows were generated by people filling out the linked form, they used the default styling. Everything worked technically, but it didn’t have the level of polish we wanted. So we turned to another Google product for help — Search. I found a post from someone sharing a script that did most of what we needed. Google Sheets includes a feature called Apps Script that enables you to extend the functionality of the core product using code to automate some actions. The script I found uses the “paint format” function to copy the style of the last row and paste it to the new one. The only other piece I had to figure out was the row height. Painting the format applies the cell styling but doesn’t affect the row height or column width, which we had adjusted to give the content more breathing room. By adding a line to the script that said, “also set the row height to 48,” it did everything we needed.
The Apps Script from @labnol, with a small tweak, that helped us format our sheet.
Including a script added a considerable level of complexity to the kit instructions. It’s attached to the Sheet, but for security reasons, it won’t run until you click through some scary messages and authorize it. This was a case where we had to find a balance between two of our guiding principles: reduce friction and sweat the details. We decided to leave it in as optional and clarify you can skip it if it’s too much trouble.
4. What’s next
At this point, Talia is focused on marketing, mostly through talking directly to potential customers and word-of-mouth through her network of tutoring customers. Her goal at this point is to get “the next 10 customers,” which she has set up a habit tracker for to talk to at least 2 potential leads per day. So we’ll see how it goes! Whatever happens this project has been a great experience for her learning to build and sell, which according to Naval, makes you unstoppable.