ติดตั้ง Stimulus บน Rails ก็แล้ว บน Sinatra ก็แล้ว ซึ่งทั้ง 2 ล้วนเป็นเว็บเฟรมเวิร์คในฝั่ง Ruby คราวนี้ถ้าต้องมาเจอโจทย์ที่จะต้องทำการกับเว็บเฟรมเวิร์คในฝั่ง Python อย่างเช่น Django กันบ้างหละ
สำหรับ Django ไม่ได้มีเครื่องมือจำพวก transpiler หรือ bundler ไฟล์ JavaScript อย่างเช่น Webpack, Rollup หรือ Parcel มาด้วย ดังนั้นทำให้เรามีอิสระในการเลือกใช้เครื่องมืออีกด้วย ซึ่งเราจะใช้ Rollup เช่นเดียวกันกับที่ใช้ในบทความ
- สร้าง django project
$ django-admin startproject starter_app
- สร้าง django app
$ ./manage startapp home
- ติดตั้ง Stimulus และ Rollup
yarn add --dev stimulus rollup @rollup/plugin-babel @rollup/plugin-node-resolve rollup-plugin-terser @babel/core @babel/preset-env @babel/plugin-proposal-class-properties
config ต่างๆ ที่เกี่ยวข้องก็ยกมาจากบทความที่แล้ว ไม่ว่าจะเป็น babel.config.json, rollup.config.js และ package.json
- สร้างโฟลเดอร์ frontend สำหรับเก็บโค้ด Stimulus
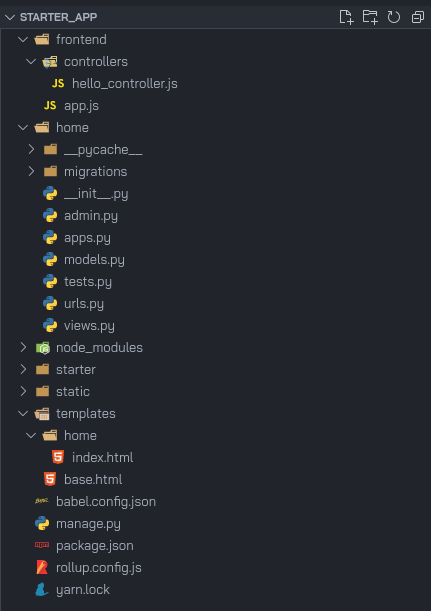
- แก้ไข config ของ rollup.config.js ให้ output ชี้ไปที่ `static/js`
- เมื่อสร้าง controller เสร็จเรียบร้อยก็คอมไพล์โค้ดผ่านคำสั่ง
$ npm run build
- โหลด JavaScript เข้าไปใน html ผ่าน script tag
<html>
  <head>
    <title>Starter App</title>
    <meta charset="utf-8">
    <meta name="viewport" content="width=device-width,initial-scale=1">
    <meta name="csrf-token" content="{{ csrf_token }}">
    <script src="{% static 'js/app.js' %}"></script>
  </head>
  ...
</html>- เรียกใช้งาน controller
  <h1>Welcome to Stimulus on Django</h1>
  <div data-controller="hello">
    <input data-hello-target="name" type="text">
    <button data-action="click->hello#greet">Greet</button>
    <span data-hello-target="output"></span>
</div>- ไหนๆ ก็ไหนๆ แล้วก็มาลอง post ข้อมูลไปยังหลังบ้านเพื่อเก็บข้อมูล heartbeat โดยจะส่ง heartbeat ไปหลังบ้านทุกๆ 10 วินาที
- เพิ่ม route และ controller สำหรับ request
# home/urls.py
from django.urls import path
from . import views
urlpatterns = [
  path('', views.index, name='index'),
  path('heartbeat', views.heartbeat, name='heartbeat'),
]
# home/views.py
def heartbeat(request):
return JsonResponse({ 'status': 'ok' })- เพิ่มโค้ดสำหรับส่ง heartbeat ใน controller
// frontend/controllers/home_controller.js
  ...
  connect () {
    this.heartbeat()
  }

  disconnect () {
    clearInterval(this.heartbeat)
  }

  heartbeat () {
    const token = document.getElementsByName("csrf-token")[0].content
    this.heartbeat = setInterval(async () => {
      const response = await post('/heartbeat', {
        headers: {
          'X-CSRFToken': token
        }
      })
      if (response.ok) {
        console.log('sent heartbeat')
      }
    }, 10000)
  }
สังเกตเห็นได้ว่าเมื่อทำการ post ข้อมูล heartbeat ไปยังหลังบ้านจะต้องใส่ header X-CSRFToken ไปด้วย เพื่อป้องกัน
cross site request forgery
source
source
References